

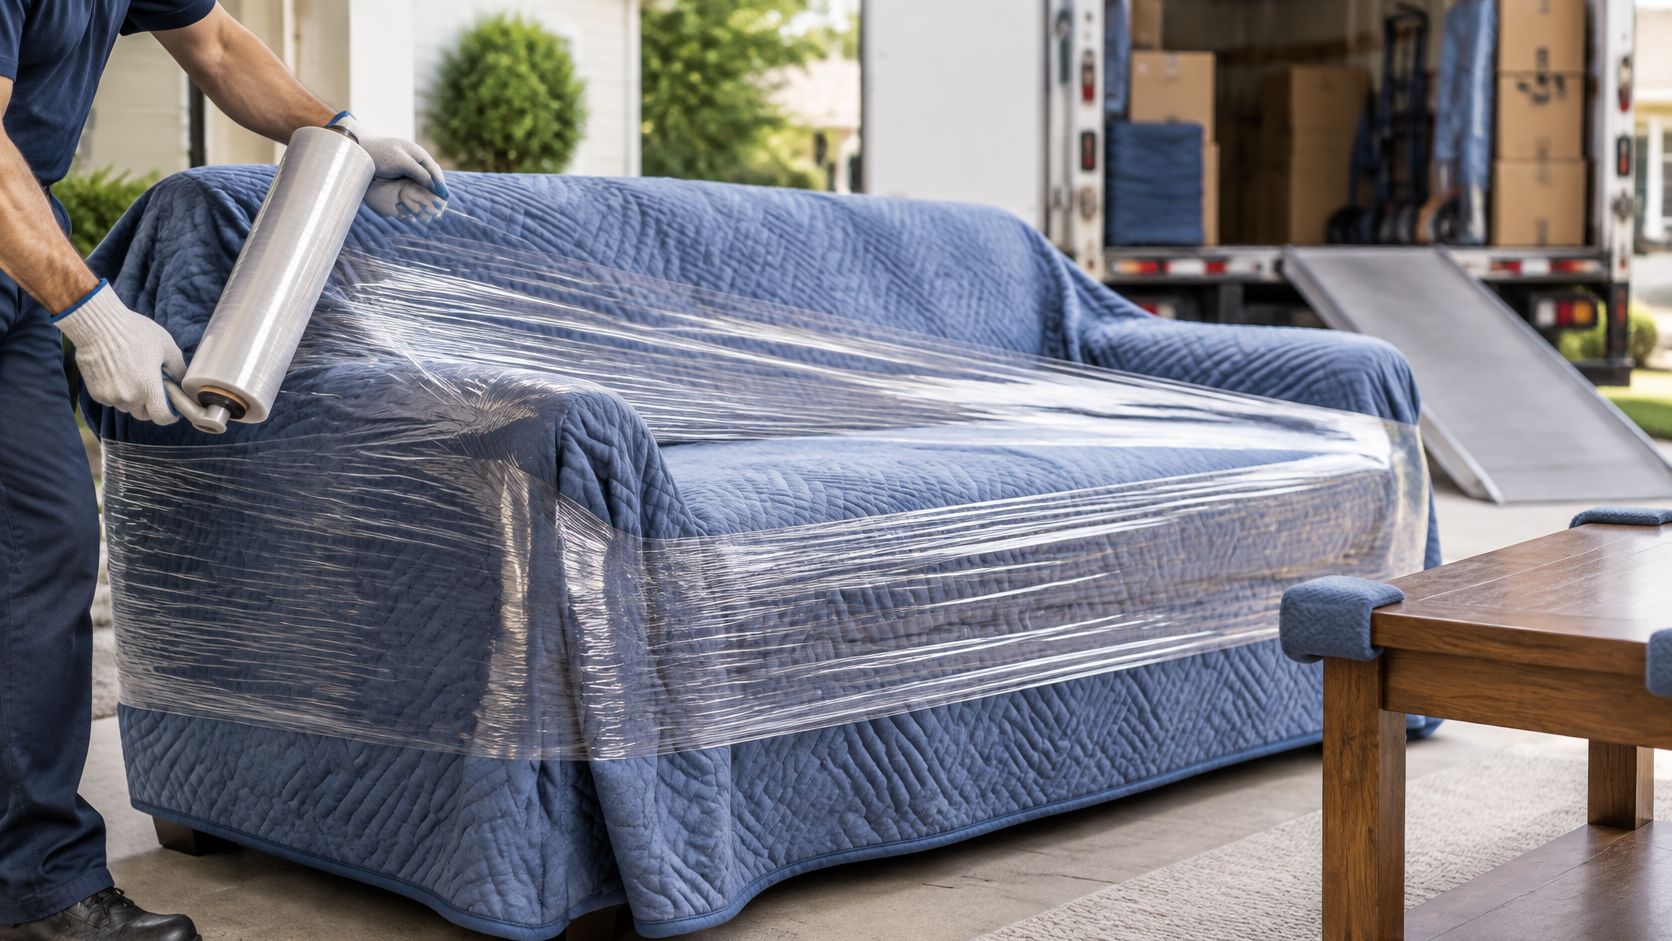
A three-seater lounge, a timber dining table, a mattress still wearing its old plastic bag, and a roll of film that weighs less than you hoped. The truck is booked for 7am, the hallway is stacked with half-filled cartons, and every tabletop you own suddenly looks more valuable than it did last week.
Shrink wrap will help, but not in the way you might expect. It doesn't stop a corner hitting a door frame and it won't make a heavy wardrobe safe to carry down a flight of stairs. What it does is hold padding against a surface, keep dust and drizzle off, and stop doors, drawers and loose cushions shifting while a piece is tilted, carried and loaded.
Get the order right and film is the cheapest part of protecting a lounge suite. Get it wrong, plastic pressed straight onto a polished surface or sealed over damp fabric, and it becomes the thing that causes the damage. Knowing which is which takes about ten minutes of decisions before you tear the first length off the roll.
Which Furniture Needs Shrink Wrap and Which Does Not
Most pieces in a house move get film. Very few get film as their only layer. The decision is per item, and it comes down to how the surface reacts to plastic, how the shape handles impact, and how long the piece will sit wrapped before someone unwraps it again.
| Furniture | Wrap approach | Main risk |
|---|---|---|
| Sofas and armchairs | Full wrap over a breathable moving blanket | Moisture trapped in upholstery and crushed fabric |
| Dining and coffee tables | Wrap top and legs separately | Corners tearing the film |
| Mattresses | Mattress bag or full wrap | Moisture during long storage |
| Wardrobes and cabinets | Wrap panels; tape doors and drawers shut | Tight film bowing panels |
| Chests and drawers | Wrap after removing contents | Drawers sliding out |
| Glass tabletops and mirrors | Box in cartons with corner guards | Film does not prevent breakage |
Read the risk column as the thing that goes wrong on moving day, not a theoretical concern. A sofa wrapped too tight arrives with flattened arms that never quite recover. A cabinet strapped so the film compresses the carcass ends up with doors that don't close square. A chest of drawers wrapped while still full turns into a set of timber missiles the first time the truck brakes.
Two pieces deserve separate handling. Mattresses should go into a proper mattress bag, sealed and taped at the end, because fabric that absorbs moisture overnight is the hardest thing in the load to dry out again. Glass tabletops and mirrors should come off the furniture entirely and travel in cartons with corner guards, which is the same approach we take on fragile removals and storage jobs. Film over a bare mirror protects nothing and hides a crack until the piece is on the wall.
Selectivity isn't just a technique point. Australia consumed about 1.28 million tonnes of plastic packaging in 2021 to 2022 and recovered 20% of it, according to the Australian Government's plastics flows and fates reporting. Wrapping what needs wrapping, and reusing blankets and guards where you can, is the practical version of that number.
A quick test before you tear the first length
Ask three questions about each piece. Is it wet or freshly cleaned? Is the surface leather, polished timber or an antique? Is it dusty? If the answer to any of those is yes, sort out the surface and moisture questions first, because film over the wrong surface locks in the problem instead of solving it.
What Materials You Need Before You Start
Wrapping goes badly when it's improvised. Halfway through a wardrobe the roll runs out, the tape is in a carton somewhere, and the film ends up stretched over bare timber because the blankets are still out in the ute. Lay the kit out first.
- Film on a roll with a hand dispenser. A 500mm roll of around 20 micron film with a dispenser handle gives you even tension and keeps your knuckles off the furniture. Thin cling film from the kitchen drawer tears on corners and goes on unevenly.
- Moving blankets and clean kraft paper. These do the actual protecting. Blankets for painted panels and upholstery, kraft paper for polished timber.
- Low-tack painter's tape, zip bags and a marker. Tape holds drawers shut and labels to the piece. Zip bags keep screws, shelf pins and knobs with the furniture they came from.
- Foam or cardboard corner guards, plus cartons with dividers. Cheap, and they save the corners that hit every door frame on the way out.
- Dry cloths and a vacuum. Dust under film behaves like sandpaper on a long drive.
- Labels. Room, orientation, and do not stack, written large enough to read in a dim truck.
Film is a dust and abrasion layer, not padding. It has no impact absorption, which is why the blankets come first on everything except a mattress bag. Rated webbing straps aren't part of the wrapping kit; they belong in the truck.
Buy tape by the carton rather than the roll, and check the packing materials for moving list before you shop so you're not making a second trip at 9pm. Cleaning properly before you wrap pays off twice: a surface free of grit can't grind, and good care habits extend your furniture's lifespan well beyond moving week.
Wrapping Each Piece Step by Step and Choosing the Right Layer
The wrap itself takes about two minutes per piece. What goes underneath the film is what protects the finish, so most of the work happens before the roll even comes out of the trolley.
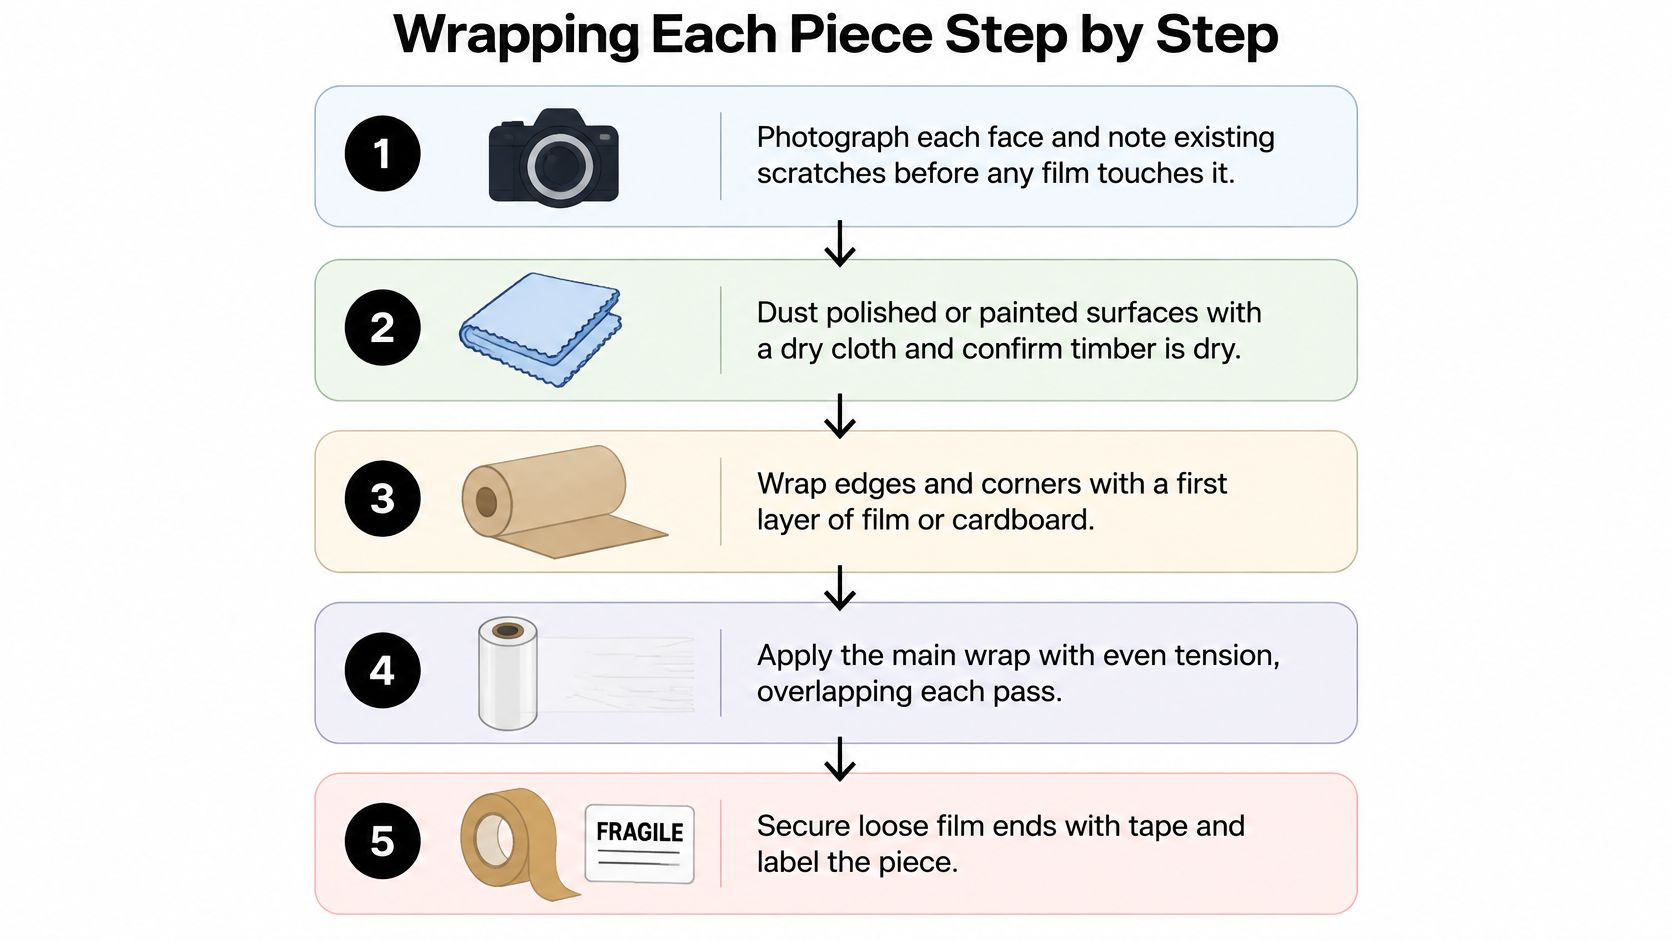
- Photograph every face before the film comes out. Note existing scratches, chips and lifting veneer. A dated photo settles a damage conversation faster than a written description, and the shots double as a reassembly reference when shelves and legs go back on.
- Clean and dry the surface. Dust under film grinds on a bumpy drive. Timber, upholstery and leather need to be dry through, since film over a damp surface holds that moisture against the material for the whole trip.
- Strip what comes off. Shelves, drawers, knobs, castors and detachable legs. Bag the hardware, label the bag, and tape it to the piece rather than into a carton. A lighter cabinet is also less likely to rack when two people carry it.
- Build the layer underneath. This is the step people skip, and the one that matters. Polished timber gets kraft paper or felt, painted panels get moving blankets, upholstery gets clean cotton or a blanket, leather gets a breathable cover, glass goes into cartons, and every sharp corner gets foam or cardboard. Match the padding to the surface, give anything fragile or valuable a second look before you start, and keep the film from ever sitting on lacquer directly.
- Wrap from the base upward with 30 to 50 per cent overlap on each turn. Target tension is firm enough to hold blankets and doors in place, loose enough that upholstery keeps its shape and cabinet panels stay flat. If the cushion bulges between turns, the film is too tight; if a blanket slides, it is too loose.
- Lock off on a structurally strong section. Several turns around the middle of a carcass or the frame of a sofa, never around a handle, hinge or decorative trim that will snap under tension.
- Cut, tuck and label. Tuck the tail under itself so it doesn't catch on a doorway and unravel the whole wrap. Label the piece with its room, which way is up, and do not stack.
| Surface | Protective layer | Film contact | Avoid |
|---|---|---|---|
| Polished timber | Kraft paper or felt | Non-adhesive barrier only | Plastic directly on the finish |
| Painted panels | Moving blankets | Loose, even contact | Tight film pressing into soft paint |
| Upholstery | Clean cotton or moving blanket | Loose enough to avoid compression | Airtight wrap on damp fabric |
| Leather | Breathable cover | Breathable layer over the leather | Airtight sealing |
| Glass and mirrors | Cardboard and cartons | Film over cartons only | Film as the sole protection |
| Sharp corners and edges | Foam or cardboard corner guards | Film over guards | Film stretched over bare edges |
The one habit that prevents most claims: photograph the piece, then pad it. Never let plastic be the first thing that touches a finish.
How long the film stays on
Application is half the job; duration is the other half. The National Archives of Australia's preservation guidance for stored materials recommends stable conditions of around 20°C with relative humidity below 60%, with 18 to 20°C at 45 to 50% humidity where specialised storage is available, and warns that materials degrade faster under light, particularly ultraviolet radiation.
Film gives you none of that. It keeps dust off and blankets on, which is a transport job. Get pieces unwrapped into a stable, shaded, dry room soon after delivery rather than leaving them sealed in a sunlit garage for a month.
Protecting your back while you wrap
Wrapping is physical work with bad posture built in, especially around low drawers and table legs. WorkSafe Victoria's guidance on stretch wrapping identifies manual wrapping as a musculoskeletal disorder risk from awkward postures, repetitive movement and sustained force, and suggests raising the work surface or using a different method where possible. At home that means lifting the piece onto a table, running the film with a dispenser, taking breaks, and clearing film tails before they turn into trip hazards.
When Wrapping Traps Moisture and How to Avoid It
The instinct is that more film means more protection. In a Sydney move it often means the opposite. Plastic is a vapour barrier: seal damp upholstery inside it and the moisture has nowhere to go except into the fabric.
NSW Health guidance on mould is blunt about the conditions that cause trouble: mould thrives in warm, damp, poorly ventilated areas, including storage spaces. NSW collection-care guidance points the same way, recommending cool, dry, stable conditions with good air circulation and warning that moisture develops from temperature and humidity differences. A humid garage in Western Sydney is exactly the environment that guidance warns about.
| Situation | Recommended approach | Reason |
|---|---|---|
| Damp or freshly cleaned furniture | Dry fully before wrapping | Condensation trapped under film |
| Same-day local move in dry weather | Light film over blankets | Short exposure; dust and scuff protection |
| Rain, humid truck or poorly ventilated garage | Breathable covers and gaps around bases | Trapped moisture and mould risk |
| Overnight in a truck or hot storage | Vent or unwrap as soon as possible | Heat and moisture build-up |
| Multi-week storage | Unwrap in a stable, shaded, dry unit | Film is not climate control |
| Storage warmer than 20°C or damper than 60% humidity | Improve conditions or unwrap | Material degradation |
The practical rules are short. Don't wrap anything wet, recently shampooed or still holding humidity from a steam clean. Use a breathable blanket under the film rather than sealing plastic against fabric. Leave the base of a wardrobe or cabinet open where you can, so air moves under the piece instead of stewing in a closed box.
Shade matters too. A wrapped piece sitting in direct sun on a driveway or in a west-facing garage heats up and holds that heat for hours.
Rule of thumb: if you can't inspect a piece at least once a week, don't seal it tightly.
The inspection routine that catches trouble
Run your hand along the contact points on each visit. Look for condensation beading on the inside of the film, a musty smell at seams and drawer fronts, dark or patchy spots on upholstery, and a white bloom on polished timber. Any of those means the film comes off and the piece airs out in a dry room before it goes back into storage.
Securing Wrapped Furniture in the Removal Truck
Film holds a load together on a trolley. In a truck it holds nothing, and that gap between the two jobs is where wrapped furniture gets damaged. A snug-looking, shiny load can still shift noticeably when the driver brakes.
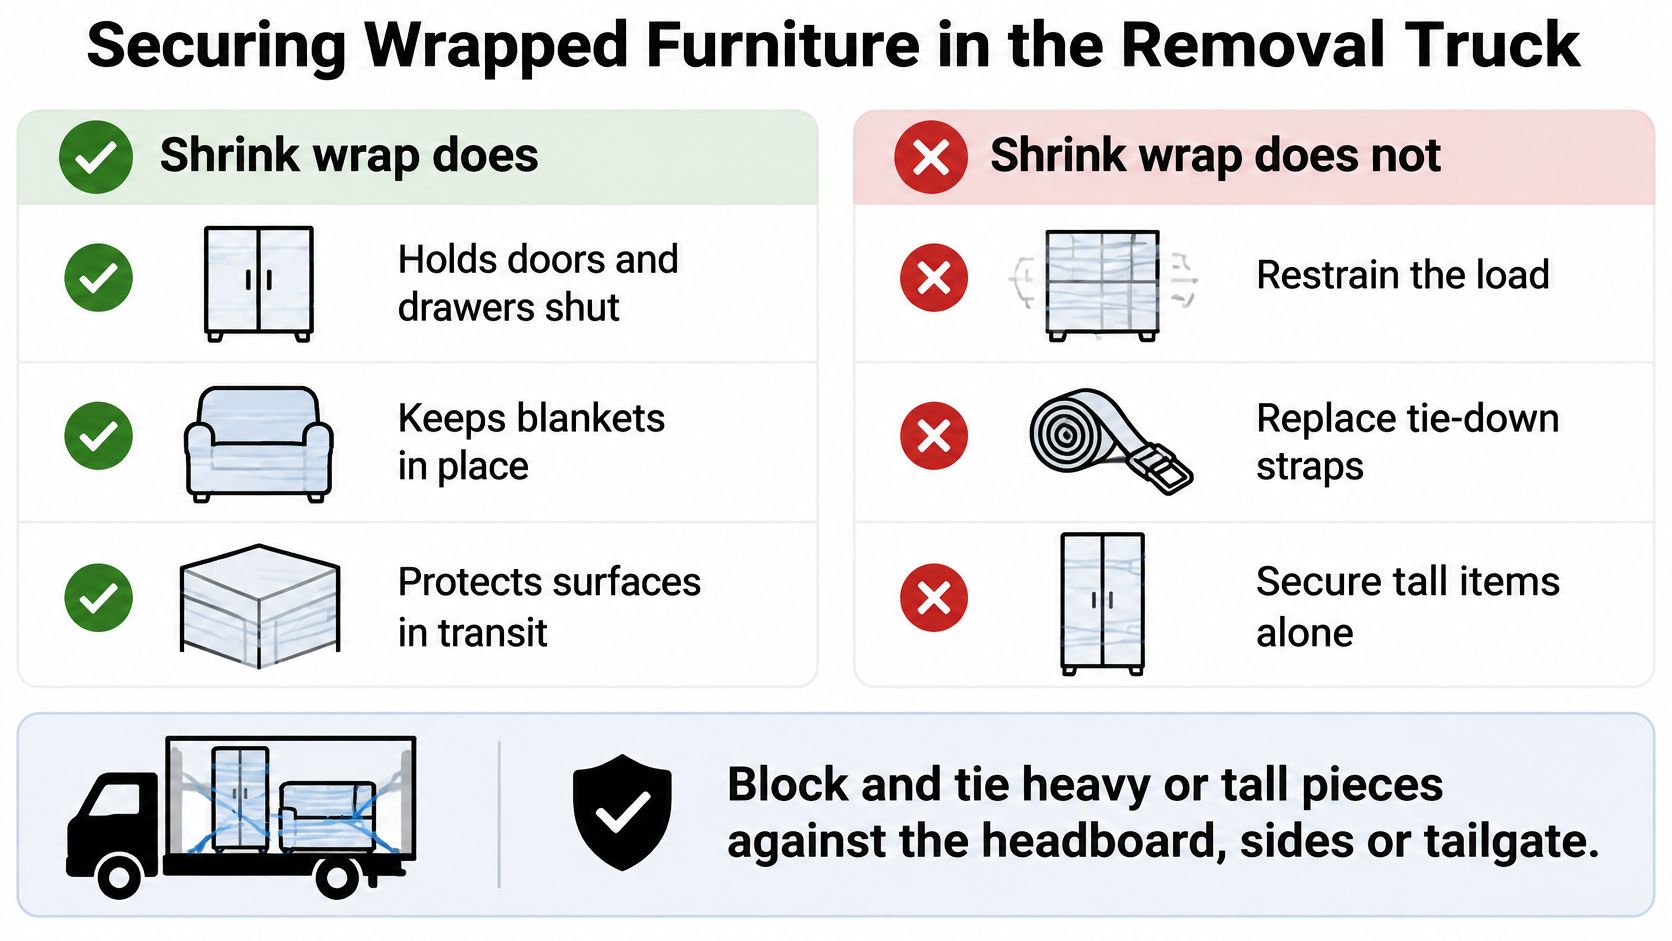
The National Transport Commission's Load Restraint Guide recommends combining tie-down, blocking and containing restraint for furniture. Heavy and tall pieces get blocked and tied against the headboard, sides or tailgate, the load is spread across the vehicle with weight over the wheel axles, heavy items sit low with lighter items above, and pieces are packed snugly with material filling the gaps. It specifically advises rated webbing straps rather than ordinary rope, checked against the weight they're holding and protected from sharp or rough surfaces.
The National Heavy Vehicle Regulator's guidance on stretch and shrink wrapping is just as direct: wrapping alone is unsuitable for heavier loads or items with edges and corners that could tear or penetrate the film, and low friction between wrapped rows lets loads move, so anti-slip material between rows helps. Treat the film as a dust and abrasion layer, never as part of the restraint system.
- Block before you strap. A piece wedged against the headboard or a side wall can't travel; a piece held only by tension can.
- Fill the gaps. Cushions, blankets and empty cartons stop the slide that slackens every strap in the load.
- Strap over padding. Webbing tightened straight onto timber, glass or a polished finish leaves marks and can cut the film and the surface beneath.
- Watch mass and sightlines. Stay within the vehicle's limits and keep lights, indicators, reflectors and the number plate clear.
Anything you can't control without twisting, reaching or a sudden change of grip needs a dolly or a second person. The archived national manual-handling code, cited in SafeWork SA's manual handling guidance, puts loads above 55 kg in mechanical-assistance or team-lifting territory. For the awkward pieces in between, our guide to how to move heavy furniture covers the lift-and-carry side properly.
Walk around the loaded truck before it leaves. Check every strap by hand, confirm nothing rocks when you push it, and re-check the load after the first 10 to 15 minutes of driving, because straps settle once the vehicle is moving. On a hot day, crack the truck doors for a minute at that stop as well: a sealed load holds heat, and a quick check tells you whether condensation is forming under the film before the drive finishes.
Unwrapping and Disposing of Used Shrink Wrap
Shrink wrap earns its keep as a dust-and-abrasion layer, and it comes off the same way it went on: cut away in sheets once the piece is in place. The last part of a move is where polished tops collect grit scratches and veneer edges lift, so give unwrapping the same care the wrapping got.
- Cut, don't peel. Run a blade along the film away from the finish and lift it clear. Peeling drags dust across a polished surface and can take a veneer edge with it.
- Check for moisture before the piece goes into position. Condensation, a musty smell or dark patches mean it needs to air out in a dry room first. Run this check after overnight truck loads and garage stopovers, where warm air meets a cool wrapped surface and damp settles under the film.
- Separate the materials. Film, cardboard, blankets and foam go into different piles, because mixed bundles are far harder to recover.
- Keep clean film dry and consolidated. Wet, crumpled film is worthless to anyone recovering it, so ball it or fold it once it is off.
- Check the rules before the bin. Flexible film jams material-recovery machinery, so it stays out of the yellow bin by default. Australian packaging reporting put soft plastics at about 352,000 tonnes, or 33%, of plastic packaging placed on the market in 2017 to 2018, with only about 29,000 tonnes, or 8%, recycled, which is why soft plastics recovery runs through dedicated drop-off points rather than kerbside collection.
Reuse is the bigger lever. Blankets, corner guards and straps that come back on the next job cut more waste than any decision made at the bin. If the move ends a lease, the clean after the furniture is out matters as much as the wrap, and this deposit-saving checklist for Miami renters sets out a sensible order to work through before an inspection. Wrap as a layer rather than a seal and a full house comes down to one armload of film.
Request a Quote for Your Sydney Furniture Move
Home Removals Sydney is a family-owned removalist based in Fairfield, NSW, handling home moves, office relocations, warehouse work and interstate removals. Our team wraps, packs, disassembles and reassembles furniture as part of the job, and we supply packing materials including boxes, bubble wrap and tape so you're not sourcing film and blankets on the morning of the move.
A detailed quote comes down to four things: how far you're going, how much volume you have, how many removalists the job needs, and whether you want packing or storage included. Pricing starts at $120/hr + GST, and every move is fully insured.
If there's a gap between settlement dates, furniture storage while moving home is worth reading before you decide what gets wrapped for a week and what goes straight into the new place.
Have three things ready when you request a quote: a rough room-by-room list, photos of anything fragile or valuable such as pianos, antiques or artwork, and the access details at both ends, including stairs, lifts and parking. Fill in the 60-second quote form and you'll hear back within 30 minutes during business hours.
Home Removals Sydney handles the wrapping, loading and transport so your furniture arrives the way it left, with fully insured moves, professional packing materials and a team that wraps to suit each surface rather than sealing everything in plastic. Tell us what you're moving, including the awkward pieces, and we'll build the quote around your actual inventory. Visit Home Removals Sydney to request your quote today.
